

A Complete Woocommerce Theme
Multi-Store is completely a Woocommerce-based theme that is perfectly curated with professionalism and e-commerce in mind. Online shopping stores nowadays have changed the lifestyles of people all over the world. Every need can be fulfilled from one single platform and these days online shopping platform is flourishing and developing day by day. Do you still waste your time and energy running inside shops to purchase things? None! Anyone loves to make their life easier, more comfortable, and more advanced.!
Are you willing to own a Shopping platform? Obviously yes! It is unimaginable to start a shopping platform without websites. The customers and seller both can get full benefits from it and it also helps to uplift the economic status of a country as well. A multi-Store theme has been launched to help you design your site for online shopping purposes. Let’s get started.
How to install Multi Store Theme?
Now, it is your time to download, install and activate the theme.
- Log in to the WordPress Administration Panels.
- Select the Appearance panel, then Themes.
- Select Add New.
- Then, search for Multi-Store. Click Install Now.
- Then, click Activate button.
- Now, the theme will be activated, and go through the following options to customize the theme step-wise.
Learn to add the site logo, site title, site icon, and Tagline.

- From the Customizer section, go to the header.
- You will see the site identity at first. Click site identity.
- Logo: You can add the main logo for your site.
- Site Title: It is the main introducing title of your website.
- Tagline: It allows you to add a tagline for your site. It is displayed below the site title.
- Site Icon: The Site Icon is used as a browser and app icon for your site. The site icon should be square and at least 512*512 pixels.
Moreover, you can increase and decrease the size of the logo. Further, you can enable and disable the site title and tagline on your requirements.
How to add multiple USP ( Unique selling point ), background, and text colors at the top left of the site?

- Go to Header. Then click at the top.
- You will see USP 1, USP 2, and USP 3.
- To select USP, you have to create pages from the dashboard pages panel.
- After you finish creating pages according to your needs, again come back to the Top section and select any three Pages in USP1, USP2, and USP3.
- You can also change the background and text color for an attractive site.
Add a contact number, contact text, and the background of the middle header for your site.

- From the Customizer section, go to the header. Next, click the middle.
- Add your Phone Number and Phone Text so that customers can be in touch with you.
- Further, you can change the middle header Background as well.
How to show the products menu on the front page and change the background of the bottom header and text color?

- Go to the header. Next, click the bottom.
- You can write your desired text on product menu label.
- Next, It allows you to change text color and background by clicking at the right of the sidebar.
- It gives you a choice to show the product menu level on the front page. If you enable it will show the product menu on the front page.
How to change the background color of a whole site? How to change the primary, footer background, header text and body text color?

- From the Customizer section. Go to the theme option.
- Next, click on the colors section.
- You can now see the option to select your desired color for your site.
- Background color: It changes the whole background of the site.
- Header text color: It changes the color of site title, tagline, and other texts from the middle header section.
- Primary color: It changes the primary color of the page.
- Body text color: It changes the body text color of about the front page.
- Footer background color: It changes the whole footer background color.
More General options for your page

From the theme option, go to the general option and customize the given features.
- Assets version: From here you can choose the minified and unminified versions according to your need.
- Layout: With this, you can change your site in a boxed and custom layout.
- Enable banner in single pages: It gives you an option to enable and disable. If enabled it will display a banner on a single page.
- Enable banner on Archive pages: If you want to display a banner on archive pages, enabling the banner will automatically show the banner on the archive page.
- Scroll to top: It will automatically enable a custom and flexible “Scroll to top” button on your WordPress website. It allows your visitor to scroll back to the top of your page with one click!
- Sidebar position: You can change the sidebar position to the left or right on your choice.
How to change font family, Font size, Line spacing, Height, Text Transformation and Font Variant?

From theme options, go to theme typography and customize all the typography options available there.
- Font Family: It changes the available standard fonts (serif, sans serif, monospace ), and google font (Poppins, Roboto, Lato, Raleway, Playfair Display, etc ).
- Font variant: It helps you change the font variant: italics and regular.
- Font size: With this, you can minimize and maximize the font size.
- Text transformation: It helps to transform your text into capitalize, Uppercase, and Lowercase forms.
- Line Height: It allows you to make spaces between words written inline format. It helps increase the line height and vice versa.
(The same process works perfectly with heading Typography { H1 to H6}options.)
How to manage Blog /Archive options in Multi Store?
Do you want to keep blog posts on your site related to your online store? If yes, At first you should write a blog post from Admin panel >Post> Add New. You can create as many posts as you want to display on the blog page. At last, don’t forget to press on publish. Let’s go for customization now.

- From the Customizer section, move to Theme Options.
- Next, click on Blog/ Archive.
- Home page Title: You can name the title of the home page.
- Read More Text: Our blog can be of more than 100 or 1000 words. We cannot show all blogs’ text on a page. so we take some excerpts and left others to read more options. With read more text you can name the read more text. That’s all.
- Post Per Row: It enables you to show your blog posts in a row. How many rows on a page is your choice.
- Post Pagination: We can post numerous blog posts and all posts cannot be displayed so to the visitors who want to see more posts can click load more and number options. You will get two options for post pagination: number and Load more.
(Note: You should create a home page for blog before customizing Blog/Archives. )
How to add a hero page and button text on front page?

- Basically, before entering this section, make sure that you have created pages from page panel.
- Secondly, From customizer, go to the front page.
- Then, click on hero section.
- Now, choose the page you want to show as a hero page.
- An advanced button already exists there. Your task is just to add button text inside button.
How to add a popular category below the hero page section?

In this section, you can add the most selling and customer’s best product category. This helps you highlight the popular product category on your site. The first and foremost task you have to do is to add a category from the Product panel on the dashboard. After you are done adding products with categories, you can now only add popular categories here.
- From the customizer, click on the front page.
- Then, click on Popular Category One.
- Next, select the popular category one by one.
- In this section, you can only select 3 popular categories.
- At last, you can add button text for a popular category. This button is displayed below the category.
Where and how can you display the popular product on your site?
It is your time to grab customers’ attention towards your site by showing the popular, attractive and highly demanded products. It is displayed in between the products category.

- Title: you can add a title to the product you want to display.
- Sub Title: Here, you can add subtitles.
- Limit: How many products do you want to display here? It allows you to add numbers to miscellaneous products.
- Product Type: You can select the product type: best selling, newest, and featured.
How to add other popular categories below the products?
Multi-Store allows you to add 6 different categories in two different locations: below the products and above the products. Likewise, you did in Popular Category One, same goes here in Popular Category Two.

- Well, you are now on customizing page.
- Go to the front page. Next, click on Popular Category Two.
- Select a Product Category you want to display.
- Also, it allows you to write Button Text for the product category.
- If you click on the button, it will show you all the products that fall under that category.
How to add an About page on the front page in Multi Store?

- From customizer, go to the front page.
- Then click on About.
- Select an About Page. This about page describes your site’s visions and missions. It is all about how you define your site.
- This page displays the image covering a large area of a front page.
How to add a header image on the inner page?

You can add a header image by clicking on the header image from the customizer.
How to add a background image for a whole site?
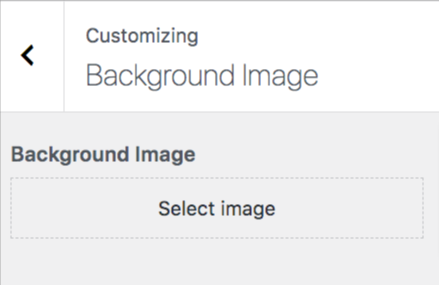
- From the customizer, click on Background Image.
- Select the image you want to add for the background.
- This image will show on all front and inner pages of your site.
How to create the Top ( USP) Menu at the top right of the header?

- From Customizer, go to Menus.
- Click on Home. Write Menu Name. Choose the Menu Location. USP menu is displayed at the top right of the page.
- Then, Add Items to the menu.
- It also allows you to delete menus if you do not require them.
How to add Primary Menu at the bottom header?

- Likewise in the home menu, From the customizer, go to menu.
- Click on Primary Menu. You can write a Menu Name. Select the Menu Location (To add a menu at the bottom header, you have to choose Primary Location for Menu Location).
- To add menus click Add Items to start putting pages, categories, and social links according to your desire and need.
How to add a product menu at the bottom header?
First of all, before adding product menus, you should be sure that you have different product categories.
For this, you have to go to Dashboard. Then click on Products and hover the cursor to Categories. Go on Add New Category and Name a Category. It also allows you to add the Parent Category of a product. Moreover, you can upload images of a category.

- From Customizer, go to Menus.
- Next, Click on Product Menu.
- Click Add Items to start putting pages, categories, and sub-categories in your menu.
- You should select Product Menu as your Menu Location.
How to manage with footer widgets area in Multi Store?
The Footer area appears at the bottom of each page on your WordPress site. You can add any components to the footer widgets area such as archives, calendars, lists, tables, slider, categories, social icons, blogs, counter, embeds, and many more.

To add footer widgets to your site follow these steps :
- Go to your WordPress Dashboard and hover the cursor to Appearance.
- Next, click on Widgets. Then move to Footer Widgets Area. You can add any blocks to your requirements.
- Click on Add Blocks (+). Select the block you want to display in the footer. You can display your desired section in different designs: columns, rows, buttons, groups and more.
- Then, Click on Update.
How to set Homepage Settings?

From Customize section, go to Homepage Settings you will see two options. Your latest posts and a static page. You can choose what’s displayed on the homepage of your site. It can be your latest posts in reverse chronological order (classic blog), or a fixed/static page. To set a static you can choose what’s displayed on the homepage of your site, you first need to create two Pages. One will become the homepage, and the other will be where your posts are displayed.
- Your Latest Posts: This option only works if Static Front Page is set to “Your latest posts.” This option allows setting the title.
- A static page: you will be able to set a page as Front Page and you will find the Post Page option as well.
- Homepage: you can set any page as a Homepage.
- Posts Page: you can set any page as a Blog.
How can you manage with WooCommerce?
This is the major plugin for online stores. And Multi Store theme is woo-commerce compatible you know.
- Store Notice: You can use it to show events or promotions to visitors!
- Product Catalog: Here you can choose what to display for a shop page. You can show it by product, category, or both. It also enables you to choose the product category page by-products, sub-categories, and both. Furthermore, it also allows you to display the products per row and rows per page.
- Product Image: It allows you to reduce and increase the size of the main image and thumbnail image.
- Checkout: It accesses customers to order the products in real. Buyer information, product information, and payment mode are to be filled in here. In short, it is a billing detail.
Conclusion
We hope the aforementioned instructions helped you a lot in setting up your website with Multi Store. If you got confused then feel free to contact us through live chat. We are here to solve all your issues that arise during customization. We are happy to be a part of your site.
Your site is now ready to run right ! Congratulations and Best wishes for your online market/business.
Thank you!